Table of Contents
The HiveMind
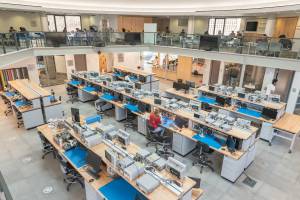
HiveMind is a wiki built by the The Hive and the Georgia Tech maker community as a resource for all students using equipment and making projects within the Interdisciplinary Design Commons (IDC).
Besides containing up-to-date information on IDC equipment, the HiveMind also contains useful advice on how to make your projects come to life, as well as step-by-step guides on how to recreate the Hive's most popular workshops on your own time and standard operating procedures for all of our equipment.
Our Technical Areas and other resources can be found here:
Resources at the IDC
At the IDC, you can find a plethora of equipment to assist you with your projects. Along with spare wood to help you downstairs, and a seemingly endless supply of 3D print materials, our electrical equipment lying behind the front desk can be found here at this. The hive is looking to create a comprehensive inventory list soon. At any time, you can come into the space and ask a PI at the front desk. If we don't have a specific component, be sure to try Senior Design on the third floor of Van Leer.
The Front Desk
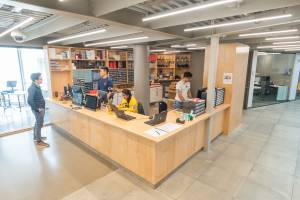 When you enter the Hive through the main entrance on the second floor, you'll see the front desk on your left. Be sure to sign in! The front desk is a place to ask questions, find information, check in for workshops, and learn about the Hive. If you have a question and don't know who to ask, the front desk is a great place to start. If the PIs there can't answer your question, they can either direct you to another resource or send a message to other PIs. If a room you need access to is locked, visit the front desk, and a PI can unlock and staff a room for you.
You can also check out equipment (for free!) at the front desk, including Raspberry Pis, motors, breakout boards, solder practice kits, USB cables, and several types of Arduinos in exchange for your buzzcard in the space. We no longer check out inventory outside the space. Other supplies, including circuit components, electrical wire, and solder, can be found near the workstations.
There are also lockers available for checkout at the front desk. If you have a big project, or don't want to carry a project back home each day then you may want to consider getting a locker. A PI at the front desk can get you a locker and a combination lock for it. If you forget your combination, we can look it up for you at the front desk too.
3D Printing
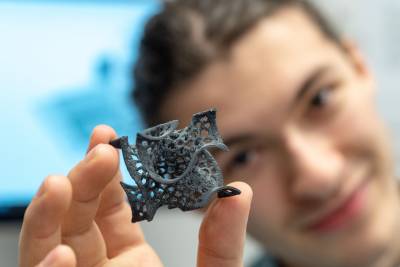 The Hive currently has 12 3D printers:
You can click on any hyperlink to learn about each specific printer. It links to their SOP! Printing at the hive is free, and is located in the Semi clean room. You can walk down and find a PI if you have something you would like to print. We only accept STL files and no gcode files since the PI's need to check each print. The printing system works by queue, and each printer may have a different queue. If you're not sure which printer you want to use, ask a PI! In addition to written and guided SOP's, we have a video series here that you can look at if you're a more visual learner. The videos are quick but may not be as informative: 3D Printing Video Series
-
- The F170 printers are dual head FDM printers extruding in Hard plastic ABS and dissolvable support material
-
- Our ultimaker printers allow our users to print in up to two materials. They are also FDM printers. These machines typically are loaded with PLA and Breakaway material.
-
- The MarkTwo is a specialty 3D printer that prints high strength parts using nylon-based material with fiber reinforcements such as carbon fiber.
-
- These SLA printers specialize in high detail and surface finish using SLA Technology. We carry multiple resins at any given time. You can stop by and check which ones we have. Normally, they are Grey, White, Draft V2, and flexible. We have 3 Form 3's and one Form 3L.
Laser Cutting
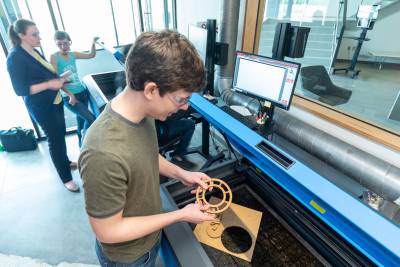 We have two laser cutters made by Universal Laser Systems Inc., which are located in the production studio on the first floor of the IDC. You can see them through the outside windows at the IDC's ground entrance. Our laser cutters can cut and engrave a variety of materials, including wood, acrylic, paper, cardboard, and in some cases, metal. If you would like to learn how to use the laser cutter, ask a PI to show you. If you already know how to use the laser cutter, stop by the IDC during open hours to use it. Remember that it may be different than the one you're used to, so don't hesitate to ask if you have any questions.
Recently, we have acquired a new laser cutter called the Fablight 4500. This laser cutter is a noncontinuous fiber laser capable of cutting through quarter inch steel very quickly. It was obtained to replace the plasma cutter. The cuts are cleaner and can also engrave various metals such as mild/stainless steel, anodized/not anodized aluminum, brass, and copper. The fiber laser cutter is very easy to use and instructions and more information can be found here: Fablight Page.
We have a couple pages of information for you to browse if you need it. These documents are written as if the person reading it is a Peer Instructor, but that in no way means that only Peer Instructors can browse it (:
- For our full Standard Operating Procedure that tells you how to use the Laser Cutter and the process of getting trained. Note that only Peer instructors have access to the machines.
- For more in depth detailed settings on how to use the more advanced settings on the laser cutter click here
- To see our common errors and how to solve them page click here
We also have video tutorials if you don't want to sift through the SOP or documents. The video tutorials will cover all the basics of the laser cutter, the documents have more niche topics that you may not be interested in. You can find the video tutorials here.
Quick FAQ about the CO2:
- Both of our Laser cutters are Carbon dioxide lasers but are able to cut through most materials with the exception of metal (it can etch the metal!)
- The Laser cutter's bed is 32 inches by 18 inches, should you have something bigger, you can cut it down in the machine shop
- We have a rotary attachment to allow you to cut on curved surfaces
- While the laser cutter can accept any files that can be sent to a normal printer, vector format types work best
- Spots on the laser cutter come on a first come first serve basis with some exceptions, we're usually busier in the afternoons and evenings
- We do provide materials to some degree, but you are encouraged to bring your own, for most of the material we give is scrap from previous projects.
Electronics Benchtop
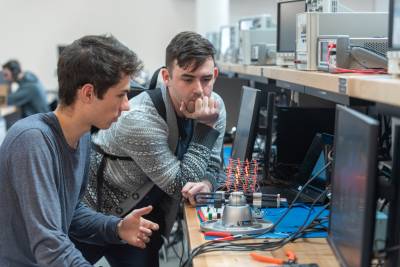 The IDC contains a suite of electronics benchtop equipment available to all end users.
Each standard station includes an:
- Oscilloscope
- Function generator
- Multimeter
- Power supply
- Soldering station, complete with a soldering iron and desoldering tool.
When you check out a station, you gain access to drawers with additional hand tools, such as tweezers, wire cutters, and screw drivers, to help you in your project.
Beginner guides on to use each piece of equipment are listed below:
In addition we also have Youtube Demo's listed for all of these different pieces of equipment found here:link
PCB Fabrication
The electroplater is no longer officially supported by The Hive. It still exists, and you can still use it (after the training sequence), but we can't guarantee quality to our standards as longer, given the maintenance requirements and the user base. To make vias in our no-plating process, make any vias as 1mm-diameter holes (excluding the annular ring), and then solder in a standard header pin.
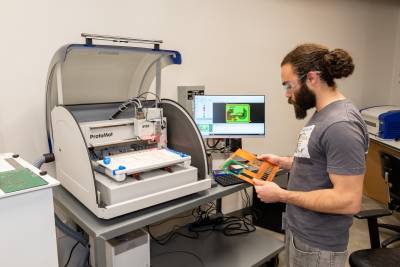 Here at The Hive, we have a suite of tools made by LPKF that enable students to fabricate printed circuit boards (PCBs). Students go through a three-step training process to gain access to the tools, after which they can use the equipment and our materials free of charge whenever The Hive is open.
There are three primary pieces of equipment used in this process:
- The LPKF ProtoMat S103 - a 2.5-dimensional plotter that drills and mills (cuts) PCB substrates, plastics, and soft metals
- The LPKF ProtoLaser U4 - a 20um-diameter laser to etch (selectively remove) a wide variety of film/substrate pairings
- The LPKF Contac S4 - a semi-automatic galvanic electroplater for via formation and other copper/tin plating needs. The electroplater works, but the quality is no longer guaranteed by The Hive, and we are actively suggesting that students look for alternative options, such as 1mm through-holes or no-via designs.
We also can cut stencils from polyamide or PET sheets (for stainless, see the laser cutting area), and assemble boards with a reflow oven. We also have a few unsupported capabilities, including applying soldermask and silkscreen, a less-complicated psuedo-masking process, as well as a chemical-free electroplating process, but again, your mileage may vary with these. Head to our PCB fabrication page for more details.
The Hive provides double-sided copper on FR4 in 0.5 oz/ft^2 (18 um) and 1 oz/ft^2 (35 um) weights to our users at no cost, though many other substrates can be used.
We are no longer requiring training for the ProtoMat or ProtoLaser. A detailed guidebook for how to fabricate PCBs using the two tools is located at the ProtoMat. Stencil fabrication information can be found in the guidebook at the ProtoLaser.
Our DRC file: DRC
Out CAM file: CAM
- No idea what a trace is? –> What is a PCB?
- Designing your own PCB? –> PCB Design
- Want to use the machines? –> PCB Training
- Looking to schedule tool time? –> Head to SUMS! (What is SUMS?)
- What can we do, and how to do it –> PCB Fabrication
- Help! –> Knowledge Base and FAQ
- Looking to take your fab to the next level? –> Tips, tricks, and process miscellany
- Something broken? –> Maintenance and troubleshooting
Questions? You can reach the PCB MPIs at hive-pcb@ece.gatech.edu.
Machine Shop
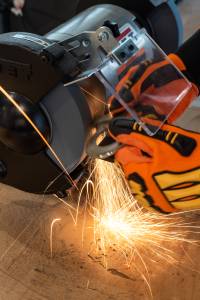 Located on the first floor, the machine shop provides resources for students to design and develop the structural components of their projects. The shop has both large power tools and small tools, which are generally geared towards woodworking. Large equipment, most of which require SUMS access, include:
- Miter saw
- Drill presses
- Scroll saw
- Band saw
- Belt sanders
- Sandblasting booth
Other tools available include (this is a long list, so we might not want to put it here):
- Cordless drills (with drill bits and screws)
- Dremmels
- Hand saws
- Jigsaw
- Saw zall
- Sandpaper
- etc.
Scrap wood is located in a large red bin inside the machine shop. For specific materials, we recommend purchasing what you need at our locallocal store or online. Lots of people also go to the nearest Home Depot which is near Ponce City, it's a little far, but probably has anything you need if you can get a ride there. Here's the address.
The Hive also has some SOP's (Standard Operating Procedures) so you can familiarize yourself with the equipment. However, you must have a PI in the room to use any of the tools in the machine shop and just reading the SOP's is not enough for training. Here are all the SOP's we have!
In addition to the SOP's, the Hive has also created a video series on the Machine shop that you can watch to familiarize yourselves with the tools. Here's the playlist. Below you can sample one of these videos.
Embedded Systems
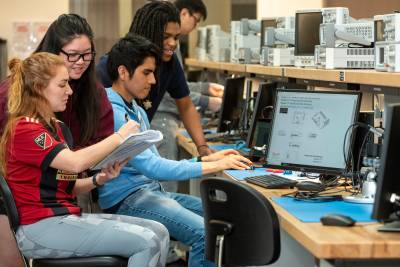 An embedded system is a digital computer system that contributes to the operation of a larger device. Although the term is often used in the same sentence as “Internet of Things” (IoT) or “smart devices,” it is better described as a broad term for embedding digital electronic systems in things. Many embedded systems use some sort of microcontroller.
At the Hive, we have a large selection of electronics available to checkout for a two-week loan period. At the end of the period, you are usually allowed to renew your loan. Examples of embedded systems resources include:
- Arduino microcontrollers
- Raspberry pis
- Adafruit lilypad
- Beaglebone
- TI launchpads
There's no such thing as a 'best' microcontroller. It all depends on what you want to do. Therefore, depending on your needs, one microcontroller might be more appropriate. For example, the fastest chips tend to use more power than the slowest ones. The boards with the most I/O pins are bigger (and usually cost more) than ones with fewer features. Below is a list of aspects to consider when choosing a microcontroller. For more information, click Here
Items are available for checkout at the front desk. We do not sell electronics parts. If you need to purchase a part, please visit an online vendor. For more information on borrowing components, see the front desk.
- Add more resources and pages on getting started with embedded systems! Logistics do not go here.
Craft Area
Ever wanted to create your own stickers, or embroider some random material? Look no further, the hive has a vinyl cutter and embroidery/sewing machine to help with any of your designs. This crafting area is located by the benchtop desks right by the stair case that leads to the bottom floor.
Our vinyl cutter is a Silhouette Cameo 3. This machine uses the computer located right next to it, and the application to use this device is called silhouette studio which is very similar to illustrator. We have anywhere from vinyl, to cardstock, and stencils for anything you want to cut with good precision.
Our sewing/embroidery machine is the Brother SE1900. You don't really need to know how to sew or embroider, as most of the process is actually computerized! We have various colors of thread for you to use and test shirts for you to practice your designs before you try it on your own material.
Spray Paint Booth
It exists! A ventilated room is located on the first floor of the IDC and can be used to make your final product look nice. Some common spray paint colors are provided, but for specific colors and substances, please purchase your own. We also have various wood stains for your convenience.
Collaboration and Study Space
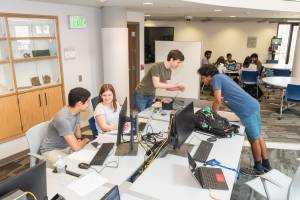 The third floor of the IDC is dedicated to providing space for students to work individually or with others on their projects. This floor features desktop computers (with spinny chairs), movable tables, whiteboards, and generally lots of space. The area is open to all Georgia Tech students for any reason. This is the only public place food is allowed in. Don't forget to sign in!
Popular Workshops
How We Clean the Space
What's up! It's cleaning the space with Matthew Lim.
If you've ever wondered how the space stays clean and how you can help us keep it that way, this is the section for you.
Editing this Wiki
Currently, only approved authors may edit the HIVE wiki.
Note that we have the Video Share plugin installed, so if you want to embed videos, please use follow instructions there.